
Server side rendering (SSR) is a technique for rendering HTML with meta tags and data when the page first loads. For React apps, the HTML is usually an empty div tag. The browser downloads the JavaScript bundle and populates the div tag with HTML. Google, the most popular search engine, crawls the content after running JavaScript. So, we may think that this is not a problem. However, Google search engine does not use the JavaScript populated meta tags. And when we use Facebook sharing, Facebook bot does not use the JavaScript populated meta tags. We need server side rendering for pre-rendering meta tags for search engines and social media sharing. In this article, I will explain the challenges involved in server side rendering with the help of a tutorial.
Challenges and Solution
Before we start with a tutorial, I want to highlight the challenges involved in server side rendering.
Users can navigate to a new route in our app using client-side script like React router or directly using a link in an email. While rendering the HTML, the server script should only output relevant HTML for the matched route.
We should have a way to populate meta tags for the current route.
React has a renderToString function which takes a component tree and renders it as HTML. However, all data which is required for the components should be pre-fetched before calling this function.
On the browser, React has a hydrate function. This function is responsible for attaching event handlers to the server rendered HTML and calling appropriate componentDidMount lifecycle or useEffect hooks. If we call the hydrate function without pre-fetching data for our components, the server rendered HTML and client side HTML won’t match. This is also called the data hydration problem. So, before we call hydrate function on the browser, we should make data available to our components on the current route.
Finally, our solution should provide 404 status code for Not found pages.
For all these challenges, there is no “standard” solution. All solutions are opinionated especially in how we pre-fetch data. Most frameworks like Next or Gatsby provide some technique to solve these problems. But doing a custom SSR solution is not very difficult. Especially when you know the challenges around it.
The tutorial that is about to follow is based on a custom solution which is based on React router and React helmet. It does not use any state management solutions like Redux or Mobx to do its work. It uses the latest Hooks API but should work well with any class based components. The final solution is available in a Github repository.
Tutorial: Server side Rendering
Create a React app with yarn or NPM.
mkdir react-ssr
cd react-ssr
yarn init (Accept defaults)
yarn add react@next react-dom@next
We can use any folder structure we want. Create the following folder structure.
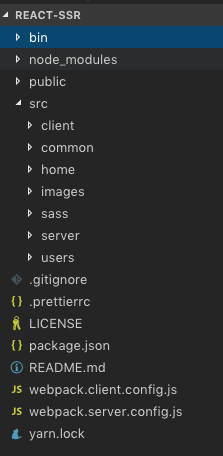
This folder structure is not mandatory. Create a src folder. Within the src folder, create client, server, sass, home, users and common folders.
- Client folder produces a JavaScript bundle which is our actual React app.
- Server folder produces a bundle which will run the express server and also do the server side rendering.
- Sass folder is for the styles.
- Home and Users are components related to the respective pages:
/and/users - Common folder has components common to all pages. Also it has utilities common to client and server folder.
Let’s start with something simple. Create a Layout component within common folder which we will render using an express server.
import React from 'react';

export default function Layout() {
    return (
        <div>React SSR example</div>
    );
}
Webpack config for Express server
Install express.
yarn add expressIn src/server folder, create an index.html file.
<html>

<head>
    <meta name="viewport" content="width=device-width, initial-scale=1">
    <link rel="stylesheet" href="styles.css">
</head>

<body>
    <div id="root"></div>
    <script src="bundle.js"></script>
</body>

</html>
This index.html is a template where we will insert pre-rendered HTML. Note that the html downloads the client side app using bundle.js and styles using styles.css.
In src/server folder, create an index.js file for running our express server.
import express from "express";
import fs from "fs";

const app = express();

app.use(express.static("public"));
app.get("*", function(req, res) {
    fs.readFile("./src/server/index.html", "utf8", function(err, data) {
       res.send(data);
    });
});

app.listen(3000);
The express server reads the index.html file and sends it out for all server requests. But before that, it serves any file which is requested from public folder. These include bundle.js, styles.css and any static assets like fonts or image files.
Since we are using ES 2015 imports, we have to use a webpack bundling process. And we also need the bundling process to transpile React components (JSX) into regular JavaScript. Create a webpack.config.server.js file in the project folder.
const path = require('path');
const webpack = require('webpack');
const nodeExternals = require('webpack-node-externals');

module.exports = {
    mode: 'development',
    target: 'node',
    externals: [nodeExternals()],
    entry: ['./src/server/index.js'],
    output: {
        path: path.resolve(__dirname, 'bin'),
        filename: 'server.js',
        publicPath: '/'
    },
    module: {
        rules: [
            {
                test: /.js$/,
                loader: 'babel-loader',
                include: path.resolve(__dirname, 'src'),
                exclude: /node_modules/,
                options: {
                    presets: [['env', { modules: false }], 'react'],
                    plugins: [
                        ['transform-object-rest-spread', { useBuiltIns: true }],
                        'transform-class-properties'
                    ]
                }
            },
            {
                test: /\.scss$/,
                loader: 'ignore-loader'
            },
            {
                test: /\.css$/,
                loader: 'ignore-loader'
            },
            {
                test: /\.(jpg|png|svg|gif|pdf)$/,
                loader: 'file-loader',
                options: {
                    name: '[path][name].[ext]'
                }
            }
        ]
    }
};
The entry point for bundling is the index file we just created. It outputs the server bundle in a bin folder. We have rules for JavaScript files, style files and image files. JavaScript files go through the babel-loader loaded with react plugin. There is an ignore-loader which ignores style files. In the server, we do not need this in the bundle. Image files go through the file-loader for getting the image filename in the src attribute.
For producing the server bundle, install the following dependencies.
yarn add babel-core babel-loader@7 babel-plugin-transform-class-properties babel-plugin-transform-object-rest-spread babel-preset-env babel-preset-react file-loader ignore-loader webpack webpack-cli webpack-node-externals --devHINT: The latest babel-loader (v8) is incompatible with babel-core, So get the babel-loader (v7.1.5)
We make use of webpack-node-externals to ensure that the final server bundle does not contain any code from node modules. This is because we are going to run the server only in our development environment. This step expedites the server bundle process.
Add a new script to package.json.
"build:server": "webpack --config webpack.server.config.js --watch"Run the server build script.
yarn build:serverThe bundling process seems to hang. This is because we have the --watch option to watch for changes to server code. When the build completes, there is a bin folder with a server.js.
To run the server, we will use nodemon.
yarn add nodemon --devAdd another script to start the server with nodemon.
"start:server": "nodemon --watch bin bin/server.js"Running this will watch for changes to the bin folder. And when a new server bundle arrives, it will restart the nodemon server with the latest code.
yarn start:serverBrowse to localhost:3000 to view our HTML template.
Bundling React App for the browser
The client side bundling process is similar. It has a different index.js as the entry point. In addition, the bundle should also produce a styles file.
In the sass folder, add an index.scss file.
body {
    font-family: sans-serif;
}
In the client folder, add an index.js file.
import React from "react";
import ReactDOM from "react-dom";
import Layout from "../common/Layout";
import "../sass/index.scss";

ReactDOM.hydrate(<Layout />,
        document.getElementById("root"));
This file has our hydrate function. Instead of the regular render function, we use the hydrate function. It adds event handlers to the existing DOM elements and formally mounts the DOM by calling the lifecycle functions. HTML from the hydrate function should match the server rendered HTML. Otherwise, there will be errors in the console. And the HTML from the hydrate function will overwrite any server rendered HTML.
Create a webpack.client.config.js file.
const path = require('path');
const webpack = require('webpack');
const ExtractTextPlugin = require('extract-text-webpack-plugin');

module.exports = {
    mode: 'development',
    entry: ['./src/client/index.js'],
    output: {
        path: path.resolve(__dirname, 'public'),
        filename: 'bundle.js',
        publicPath: '/'
    },
    module: {
        rules: [
            {
                test: /.js$/,
                loader: 'babel-loader',
                include: path.resolve(__dirname, 'src'),
                exclude: /node_modules/,
                options: {
                    presets: [['env', { modules: false }], 'react'],
                    plugins: [
                        ['transform-object-rest-spread', { useBuiltIns: true }],
                        'transform-class-properties'
                    ]
                }
            },
            {
                test: /\.scss$/,
                use: ExtractTextPlugin.extract(['css-loader', 'sass-loader'])
            },
            {
                test: /\.css$/,
                use: ExtractTextPlugin.extract(['css-loader'])
            },
            {
                test: /\.(jpg|png|svg|gif|pdf)$/,
                loader: 'file-loader',
                options: {
                    name: '[path][name].[ext]'
                }
            }
        ]
    },
    plugins: [
        new ExtractTextPlugin('styles.css')
    ]
};
This is very similar to the server side webpack. The only changes are related to processing sass and css files. They go through the css-loader and sass-loader. And we also use the ExtractTextPlugin to output the styles to a separate file.
yarn add css-loader sass-loader node-sass extract-text-webpack-plugin --devHINT: The version of extract-text-webpack-plugin (which worked for me) is 4.0.0-beta.0.
Add the client build script to package.json.
"build:client": "webpack --config webpack.client.config.js --watch"Run the build process.
yarn build:clientThis will produce bundle.js and styles.css in the public folder. Our express server serves files within the public folder as static files.
For starting our development environment, we have three NPM scripts. To simplify, we use npm-run-all package to run these scripts in parallel.
yarn add npm-run-all --devAdd a start script to package.json.
"start": "run-p build:client build:server start:server"When we run yarn start, the server and all webpack build processes run in parallel. And when any of the files changes, the server restarts with the latest bundle.
Render components as HTML string
We get to the core of server side rendering now. As a first step, we render all components as a HTML string using the built-in renderToString function.
Create a new file – renderer.js in server folder.
import React from "react";
import ReactDOM from "react-dom/server";
import Layout from "../common/Layout";

export default function renderer(html) {
    const serverHtml = ReactDOM.renderToString(<Layout />);
    const regex = /(<div id="root">)(<\/div>)/;
    html = html.replace(regex, function(original, div1, div2) {
        return div1 + serverHtml + div2;
    });
    return html;
}
We call renderToString function and pass in the Layout component (our root component for now). With some regex, we insert the server rendered HTML within the div tag with root id.
Call the renderer function from server/index.js.
import renderer from "./renderer";

app.get("*", function(req, res) {
    fs.readFile("./src/server/index.html", "utf8", function(err, data) {
        const html = renderer(data);
        res.send(html);
    });
});
With this change, we have our first server rendered HTML. Use “Page source” option to view the HTML.
Using React Router to organize app into pages
Install react router.
yarn add react-router-domWe’re going to have a static Home page and another page called Users page with data fetched from an API.
In home folder, create Home component.
import React from "react";
import { Link } from "react-router-dom";

export default function Home() {
    return (
        <div>
            <h1>Home component</h1>
            <p>Both the below navigation should work!</p>
            <a href="/users">Users via server render</a>
            <br />
            <Link to="/users">Users via react router link</Link>
        </div>
    );
}
In users folder, create Users component.
import React, { useEffect, useState, useContext } from "react";
import { Link } from "react-router-dom";
import axios from "axios";

function loadData() {
    return axios
        .get("http://react-ssr-api.herokuapp.com/users")
        .then(response => {
            return {
                users: response.data
            };
        });
}

export default function Users(props) {
    let [users, setUsers] = useState([]);

    useEffect(() => {
       loadData().then(data => {
            setUsers(data.users);
        });
    }, []);

    return (
        <div>
            <h1>Users component</h1>
            <Link to="/">Back to home page</Link>
            <h2>List of users</h2>
            <ul>
                {users.map(user => (
                    <li key={user.id}>{user.name}</li>
                ))}
            </ul>
        </div>
    );
}
Users component has a link back to the home page. And also have a list of users fetched from an API (API was put together by Stephen Grider for his Udemy course on SSR). For calling the API, we use axios.
yarn add axiosOpen the Layout component and modify it to include the routes.
import React from 'react';
import { Route, Switch } from 'react-router-dom';
import Home from '../home/Home';
import Users from '../users/Users';

export default function Layout() {
    return (
        <div>
            <div>React SSR example</div>
            <Switch>
                <Route path="/" exact component={Home}></Route>
                <Route path="/users" exact component={Users}></Route>
            </Switch>
        </div>
    );
}
The final step is to add the Router component. Here is where there is some difference between the server code and client code. BrowserRouter is what we regularly using in our React apps. But this does not work on the server side. For server side rendering, React router team has come up with another router called StaticRouter.
Open client/index.js file and add BrowserRouter component as root.
import { BrowserRouter } from "react-router-dom";

ReactDOM.hydrate(
    <BrowserRouter>
        <Layout />
    </BrowserRouter>,
    document.getElementById("root")
);
Open server/renderer.js and add StaticRouter component.
import { StaticRouter } from "react-router-dom";

export default function renderer(html, path, context) {
    const serverHtml = ReactDOM.renderToString(
        <StaticRouter location={path} context={context}>
            <Layout />
        </StaticRouter>
    );
    const regex = /(<div id="root">)(<\/div>)/;
    return html.replace(regex, function(original, div1, div2) {
        return div1 + serverHtml + div2;
    });
}
StaticRouter component has two props – location and context. Location prop is the current path requested. We have it as part of the express request object as request.path property. Finally, we pass a context object. Right now, it is empty. Any of the page components can use the context object to add new properties.
Open server/index.js to call the renderer function with appropriate arguments.
const context = {};
const html = renderer(data, req.path, context);
res.send(html);
When you run the app now, we should be able to navigate between the / route and /users route. In addition, the server should pre-render both pages.
Pre-render meta tags using react-helmet
For SEO and social media sharing, bots depends on meta tags specified in the head section. For each page, this is different. If we take a pure JavaScript approach for populating these tags, the bots don’t get these tags as they don’t run JavaScript. Both Facebook bot and Google crawler don’t use meta tags populated with JavaScript. React Helmet offers a solution for server side rendering of meta tags.
Install react-helmet.
yarn add react-helmetOpen home/Home.js and use meta tags within Helmet component.
import Helmet from "react-helmet";

<div>
    <Helmet>
        <title>Home page</title>
        <meta name="description" content="Home page description" />
    </Helmet>
    <h1>Home component</h1>
Open users/Users.js
<Helmet>
    <title>Users page</title>
    <meta name="description" content="Users page description" />
</Helmet>
With Helmet component added in individual pages, we have distinct meta tags for each page. However, these tags are not yet available in our server rendered HTML. Helmet offers a manual way to insert this into the HTML.
import Helmet from "react-helmet";

export default function renderer(html, path, context) {
    const serverHtml = ReactDOM.renderToString(
            <StaticRouter location={path} context={context}>
                <Layout />
            </StaticRouter>
        );
    const regex = /(<div id="root">)(<\/div>)/;
    html = html.replace(regex, function(original, div1, div2) {
        return div1 + serverHtml + div2;
    });

    // helmet related code
    const helmet = Helmet.renderStatic();
    const head = helmet.title.toString() + helmet.meta.toString();
    const index = html.indexOf("</head>");
    const html1 = html.slice(0, index);
    const html2 = html.slice(index);
    return html1 + head + html2;
}
The renderStatic method of Helmet component computes the final meta tags populated by various Helmet components. Convert this to a HTML string. And insert it just above the closing head tag.
View “Page Source” to verify that the rendered HTML has the right meta tags.
Not Found (404) Page
Type some gibberish (after localhost:3000/) into the browser window and see what happens. We should see a blank page beneath the Layout component. However, the browser does not receive a 404 status code from the server. We can verify this by looking at the network tab in developer tools. To enable 404 status code from the server, we use the context object of StaticRouter component.
Open common/Layout.js and add a 404 route.
<Switch>
    <Route path="/" exact component={Home} />
    <Route path="/users" exact component={Users} />
    <Route component={NotFound} />
</Switch>
In common folder, create NotFound.js file.
import React from 'react';

export default function NotFound({ staticContext }) {
    if (staticContext) {
        staticContext.notFound = true;
    }
    return (
        <div>Not found</div>
    );
}
Static Router passes a new prop named staticContext to all page-level components. These components can pass back some information in the prop. In the NotFound component, we set a flag to true. The name of the prop is arbitrary. Only the express server code needs to know this.
Open server/index.js and check the context object for the notFound prop.
const context = {};
const html = renderer(data, req.path, context);
if (context.notFound) {
    res.status(404);
}
res.send(html);
When we type some gibberish in the browser, we should now see the NotFound component. And in the network tab, we get the 404 status code from the server.
Pre-render HTML with pre-fetched data
By far, the most difficult part of server side rendering is related to fetching data and providing all the components with that data. It should be easy. But unfortunately, this step is not well-supported by React router currently.
We do not need to pre-fetch data in all our components. But only those components related to the current route. For this, we have to use yet another package, react-router-config.
yarn add react-router-configOpen users/Users.js file and export the loadData function.
export function loadData() {In common folder, create a new file, getData.js
import { loadData as loadUserData } from "../users/Users";
import { matchRoutes } from 'react-router-config';

const routes = [
    {
        loadData: undefined,
        routes: [
            {
                path: "/",
                exact: true
            },
            {
                path: "/users",
                loadData: loadUserData
            }
        ]
    }
];

function noOp() {}

export default function getData(path) {
    const matches = matchRoutes(routes, path);
    return matches
        .filter(m => !!m.route.loadData)
        .map(m => m.route.loadData().catch(noOp));
}
In this file, we specify the routes as a regular JavaScript object. In our case, we have a Layout component which has two routes: / and /users. Instead of defining a route with the regular component prop, we specify the route with a loadData prop. The name of the prop is arbitrary. What we want to do is get all the matched routes for the current path and call the function specified in the loadData prop. This function is an async function and returns a Promise. Sometimes, the loadData prop is undefined which implies that the component does not need any data to do its work. In our case, Both the Layout component and Home component does not require any data. Finally, before we return the Promise, we catch any exceptions with an empty function. This ensures that the server does not hang.
Now that we have a way to pre-fetch data for components in the route, let’s use that in the renderer function.
Open server/renderer.js and wrap the server side rendering with the resolved promise.
import getData from "../common/getData";
...
const promises = getData(path);
context.data = {};
return Promise.all(promises).then(responses => {
    responses.forEach(r => {
        if (r) Object.assign(context.data, r);
    });

    const serverHtml = ReactDOM.renderToString(
        <StaticRouter location={path} context={context}>
            <Layout />
        </StaticRouter>
    );
    ...
});
Note that we are assigning all data to the staticContext prop.
Open Users component and check the staticContext prop.
let [users, setUsers] = useState([]);
...
if (props.staticContext) {
    users = props.staticContext.data.users;
}
Finally, fix the renderer function call in server/index.js
renderer(data, req.path, context).then(html => {
    if (context.notFound) {
        res.status(404);
    }
    res.send(html);
});
With these changes in place, the /users route renders pre-fetched data in the server HTML. Verify by opening “Page Source” on the browser. However, if you check the JavaScript console in the browser, there is an error.
Data Hydration on the browser
Data Hydration is a typical problem we encounter with server side rendering. The server has pre-fetched data. However, when we call ReactDOM.hydrate function on the browser, the component renders with an empty state. And so there is a mismatch between the server HTML and browser HTML.
To circumvent this problem, we will pre-fetch data on the browser and put that data in a Context.
In the client folder, create a new file, StaticContext.js
import { createContext } from 'react';
export default createContext();
Open client/index.js and modify it.
import getData from "../common/getData";
import StaticContext from "./StaticContext";

const path = window.document.location.pathname;
const promises = getData(path);
const data = {};
Promise.all(promises).then(responses => {
    responses.forEach(r => {
        if (r) Object.assign(data, r);
    });

    ReactDOM.hydrate(
        <StaticContext.Provider value={data}>
            <BrowserRouter>
                <Layout />
            </BrowserRouter>
        </StaticContext.Provider>,
        document.getElementById("root")
    );
});
We pre-fetch all data related to the current route and store it in the StaticContext we created. The final step is to use data from the context in the Users component.
Open Users component and modify it.
import StaticContext from "../client/StaticContext";

export default function Users(props) {
    let [users, setUsers] = useState([]);
    const data = useContext(StaticContext);

    useEffect(() => {
        if (!data || !data.users) {
            loadData().then(data => {
                setUsers(data.users);
            });
        }
    }, []);

    if (data && data.users) {
        users = data.users;
    }

    ...
}
Within the Users component, we use the new useContext hook. If there is data related to users within the context, we use that. Note that we use this Context only for browser side hydration and this won’t change. And finally, as a performance optimisation, if there is data within the context, we disable the API call in useEffect hook.
With this, we have successfully done server side rendering of our React app.
Summary
Server side rendering is an advanced React topic. This is because it is an optimisation done for search engines as well as sharing on social media. We pre-render only the public portion of our website which is available to all users. Most parts of the website which is interactive and requires authentication can use the regular React SPA model.
There is no single standard solution to do this. We do not need global state management packages like Redux or Mobx to do this. Frameworks like Next and Gatsby offers built-in support and have their own learning curves.
In this article, we went through a tutorial to understand the challenges involved in server side rendering. We started with webpack configuration for bundling both our server and browser scripts. Then, we did server side rendering of a simple Layout component. With react router, we added routes and configured different routers for the server and the browser. React Helmet offers an API to pre-render JavaScript populated meta tags. We also learnt how to configure a 404 status code using React router context. And finally, we went through the tough part of pre-fetching data and render the right HTML both at the server and the browser. The last step is also known as the data hydration issue and is often the reason why so many frameworks tend to be opinionated.
The entire source code is available in Git repo.
Hello Vijay,
It’s very helpful article. It works well.
But I got one issue while using package mdbreact with it. I am getting an error with this setup while its creating build for client.
ERROR in ./node_modules/mdbreact/dist/css/mdb.css
Module build failed (from ./node_modules/extract-text-webpack-plugin/dist/loader.js):
ModuleParseError: Module parse failed: Unexpected character ” (1:0)
Can you please help me with this?
Thanks
Thanks a lot of, very helpful.
I’m learning how to setup SSR for React Js now.
In the steps above to form this app we have exposed the api endpoints, but ideally this should not be the case as it may lead to security concerns. So is there any modification in the present app so as to protect the endpoints.
Usually, server side rendering is done for websites that are publicly available to everyone. So, securing the endpoint is not a concern for these websites. But if you are doing SSR for better page load experience, then authentication and securing the endpoint is a big concern. Frameworks like NextJS do this for you with some configuration.